- Introduction
- Part 1 - Installation of the Car PC
- Part 2 - Adding a Rear-View Camera
- Part 3 - Time for some Software!
- Part 4 - An LED message sign
- Part 5 - Voice Commands
- Part 6 - Phone Integration
- Part 7 - XM Radio Integration
- Part 8 - Permanent Internet
- Part 9 - Front Camera
- Part 10 - Digital Dash
- Part 11 - Shuttle Jog Wheel
- Frequently Asked Questions
Car PC Installation
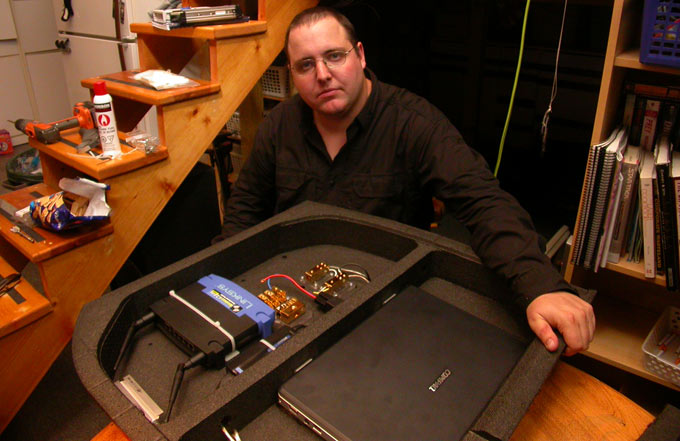
Soon after buying my car, I knew I would be putting a computer into it. Several weeks of research and hours of install time later, with my friend Justin helping me, behold the fruit of our labour:
How we did it
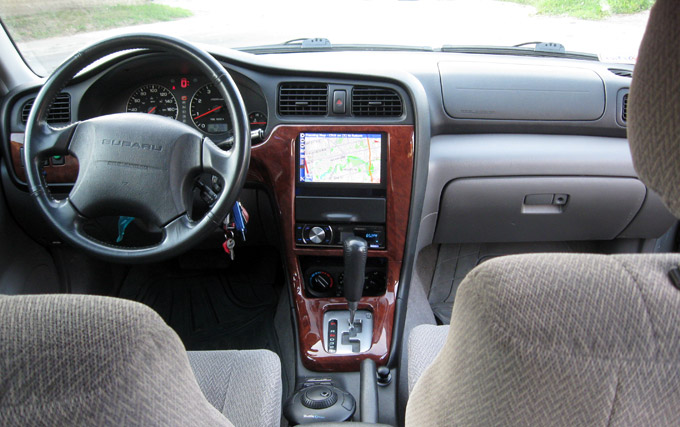
I originally chose the Xenarc MDT-X7000 deck for my car, but it turned out to be a pretty crummy deck. You can still see it in some older photos and videos, but I've since replaced it with a Lilliput EBY-701 transflective daylight-readable LCD screen that's built into my dash.I also chose to go with a laptop computer, rather than the more common choice for Car PCs of using a Mini-ITX system. The reason for this is because I could get a powerful system with features like a battery, wifi, etc. already built in.
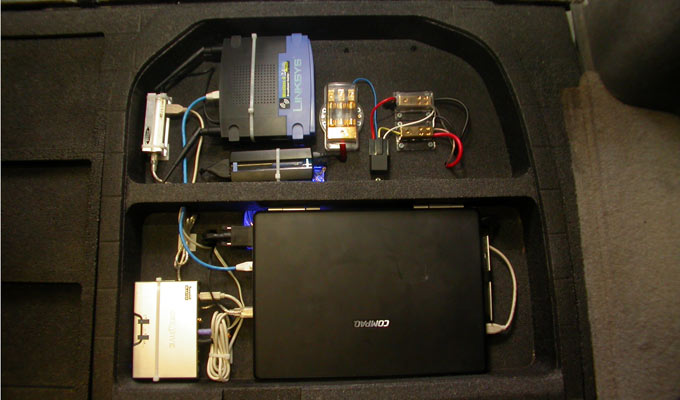
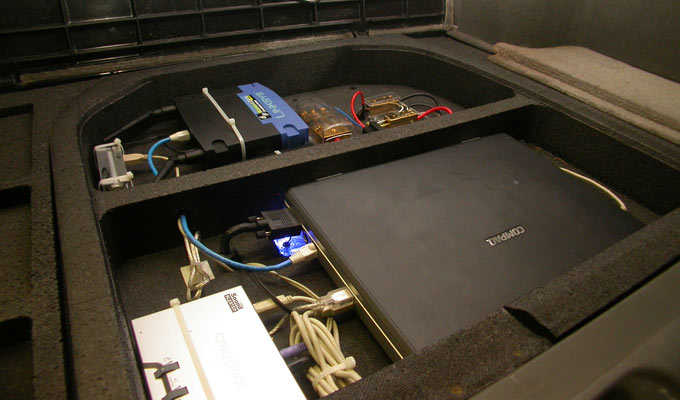
Here are the parts in use to date:
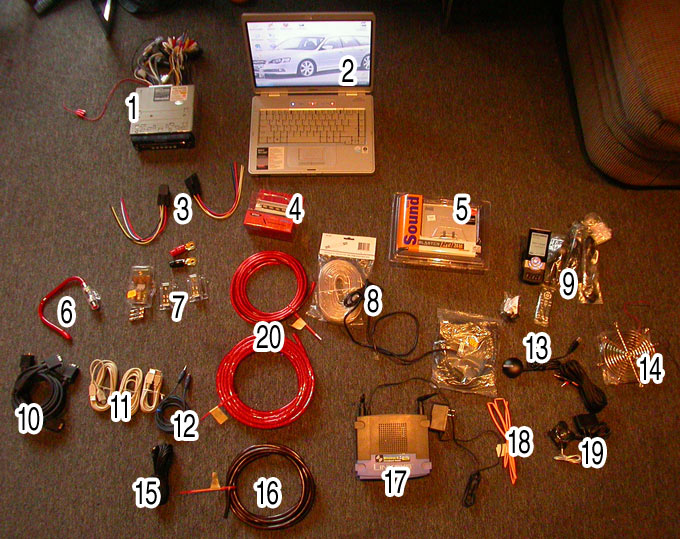
- Xenarc MDT-X7000 (now replaced with Lilliput EBY-701)
- Compaq Presario 571NR (Core 2 Duo 1.73, 2gb ram, 80gb hdd)
- Sockets for power relay
- USB hub #1
- Creative USB sound card (laptop sound card is not that great)
- Power fuse and battery leads
- Fuse and power blocks
- Extra wire for signalling
- XM Radio (since replaced with XM-PCR)
- VGA cables
- USB extension cables
- Audio cables
- Weatherproof USB GPS unit
- 6 1/2" 12V cooling fan
- Audio cables
- 4 gauge ground wire
- Linksys rounter used for WOL power
- Heatshrink used for clean soldering
- USB hub #2
- 4 gauge power wire from battery
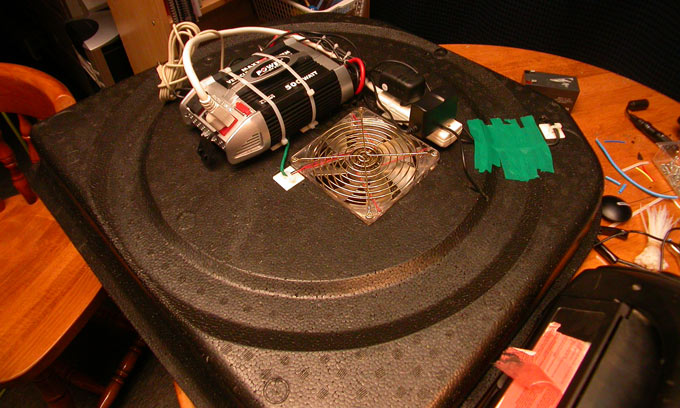
Here, Justin is busy making holes in the styrofoam and placing parts:
Bench-testing our assembly:

Justin decided the best way to control all of the circuitry going in the trunk would be by running a huge 4-gauge power wire directly from the battery (fused at both ends, of course) and then using a relay to switch the power on when the car's ignition was engaged. This made sense to me as well, so we included a big 30 amp power relay to switch the juice.
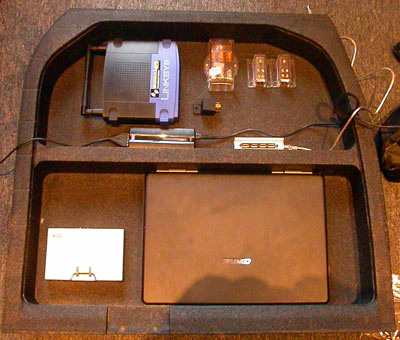
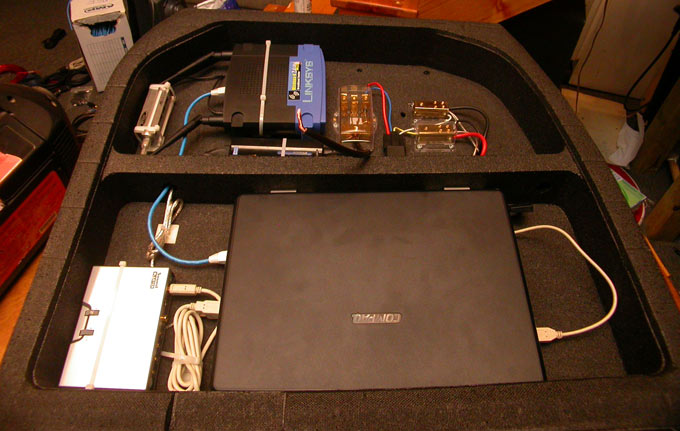
Soon, we had our assembly to a nearly ready-to-install point:
The reverse side is not as clean, but all of the 120 V AC stuff is on this side. The green tape is temporary!
The 120V stuff has since all been replaced with DC power, so the inverter is no longer in use.
Getting ready to move into the garage to start working on the car, Justin is crimping the ground wire:
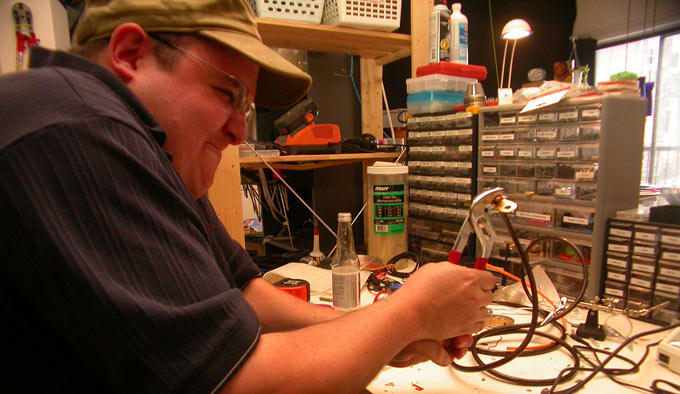
We moved into the garage.
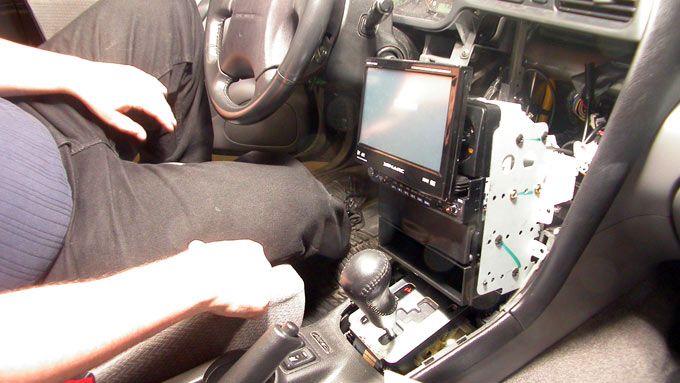
Pulling up trim panels left and right, Justin left me to figure out how to get the massive bunch of wires (VGA, 3 audio, USB, signal, and XM antenna) from the trunk to the front of the car.
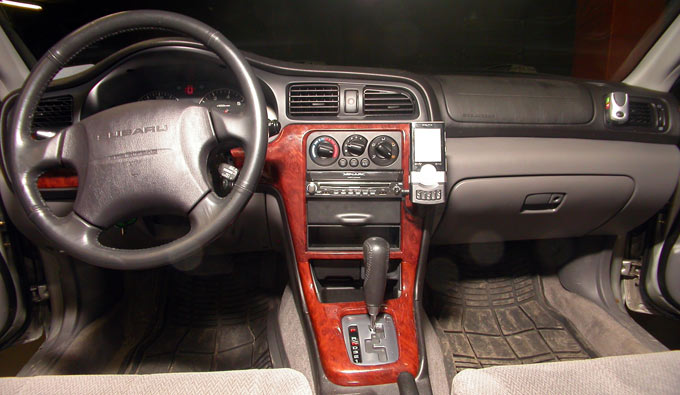
After many hours of cursing and yelling later, we had the front dash apart and installed the deck (no longer there):
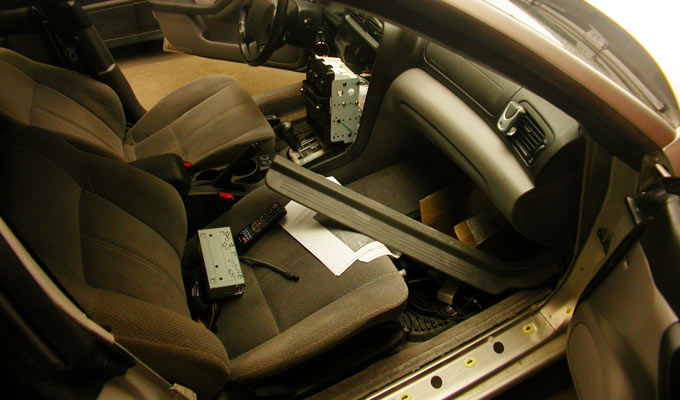
Work was progressing quickly but it was still a huge job. Here's the passenger side of the car with trim panels askew, tools littering the space:
The first power test in the car. The fan needlessly glows blue, but hey it was 10 bucks at the gorilla store and it's huge!
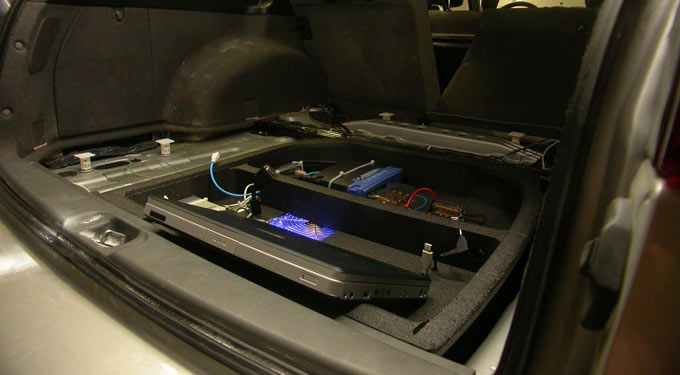
Here you see the laptop before we had the deck ready:
After a few more hours of cursing and some creative use of a Dremel tool (turns out the bezel panels around the radio are just slightly too small) and we are finished!
Here's what the deck looks like when it's closed:
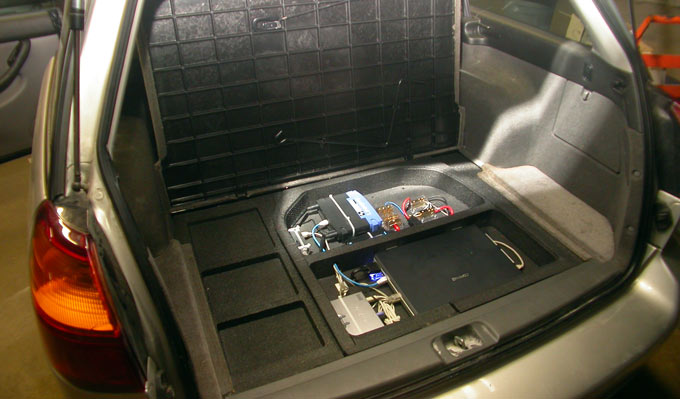
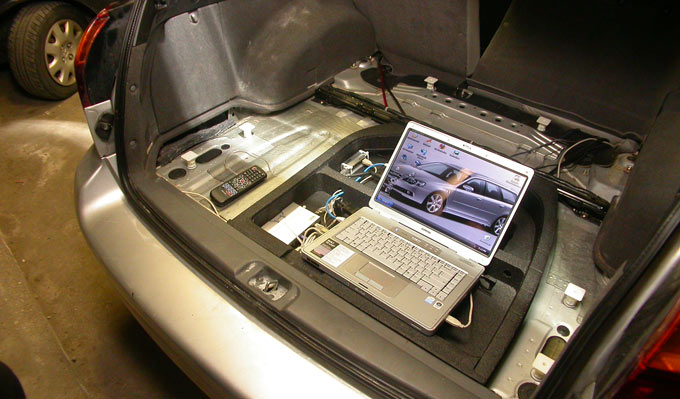
There is zero trunk space used up:
A very clean install, if I may say so: