
PopCARD: Pop Machine Cash Card
UPDATE: Most of this article refers to the first version of PopCARD. I've since upgraded it. You should read this article first, or you can jump directly to the updateA few years ago, I bought a drinks / vending / pop machine on Craigslist for about $800. It was in very good condition and had clearly not been used very much at all. In fact, the only maintenance I've had to perform on it was to replace one of the light tubes.
The machine is made by Dixie Narco, and it turns out the machine is quite common and very capable, although by vending standards it is now considered "out of date". But it's good enough for my needs. I put it in the hallway of my building and use it to sell a variety of drinks to my neighbours.
Just 6 days ago, as I was fishing around for change to buy a drink from my own machine, I wondered how difficult it would be to add a key-override for myself, so I could buy drinks without having to put money in. That idea quickly ballooned into building a full-fledged cash card system that all of my neighbors could use. But, what was the best way to make the machine think that money had been inserted without actually doing it?
Digging through the service manual for the machine, I found and then quickly ruled out using the "modern" protocol that coin changers and credit card readers use to interface with the machine. This protocol is called MDB, short for Multi Drop Bus. It's a powerful protocol, but it has an irritating 9-bit word with an 11-bit transmission protocol, and it seemed to be much too complicated for what I really needed. So, I turned my attention to the mysterious port on the machine's main board, labeled "P8", designated for dollar bill acceptors.

In this photo, you can see the port circled in red. It is labelled "Bill Validator Interface" and has 8 pins. However, no other information about the connections was forthcoming. The service manual only contained information about compatible changers, but that didn't get me far. I spent hours digging around on the internet as well as speaking to the authorized distributer for Dixie-Narco in Canada, with no luck.
The big break came when a phone call to 'Dennis', a tech rep at Crane (the company that bought Dixie-Narco), was able to find me the pinout of the port. Here's what he gave me:
- 1 - Vend NO
- 2 - Vend COM
- 3 - Low Level Inhibit COM
- 4 - AC HOT
- 5 - AC Neutral
- 6 - Low Level Inhibit 2
- 7 - Low Level Inhibit 1
- 8 - High Level Inhibit 1
So, those pinouts looked about as greek to me as I'm sure they do to you. And with 110V right on the same connector, I wanted to be really sure of the wiring before I put any connections to them! With help from my friend Justin, we were able to figure out that shorting Vend NO and Vend COM twice caused the machine to add a credit of $1.00. In addition, I discovered that when 5V is present on Low Level Inhibit 2, the machine is ready to accept money, and otherwise it is not.
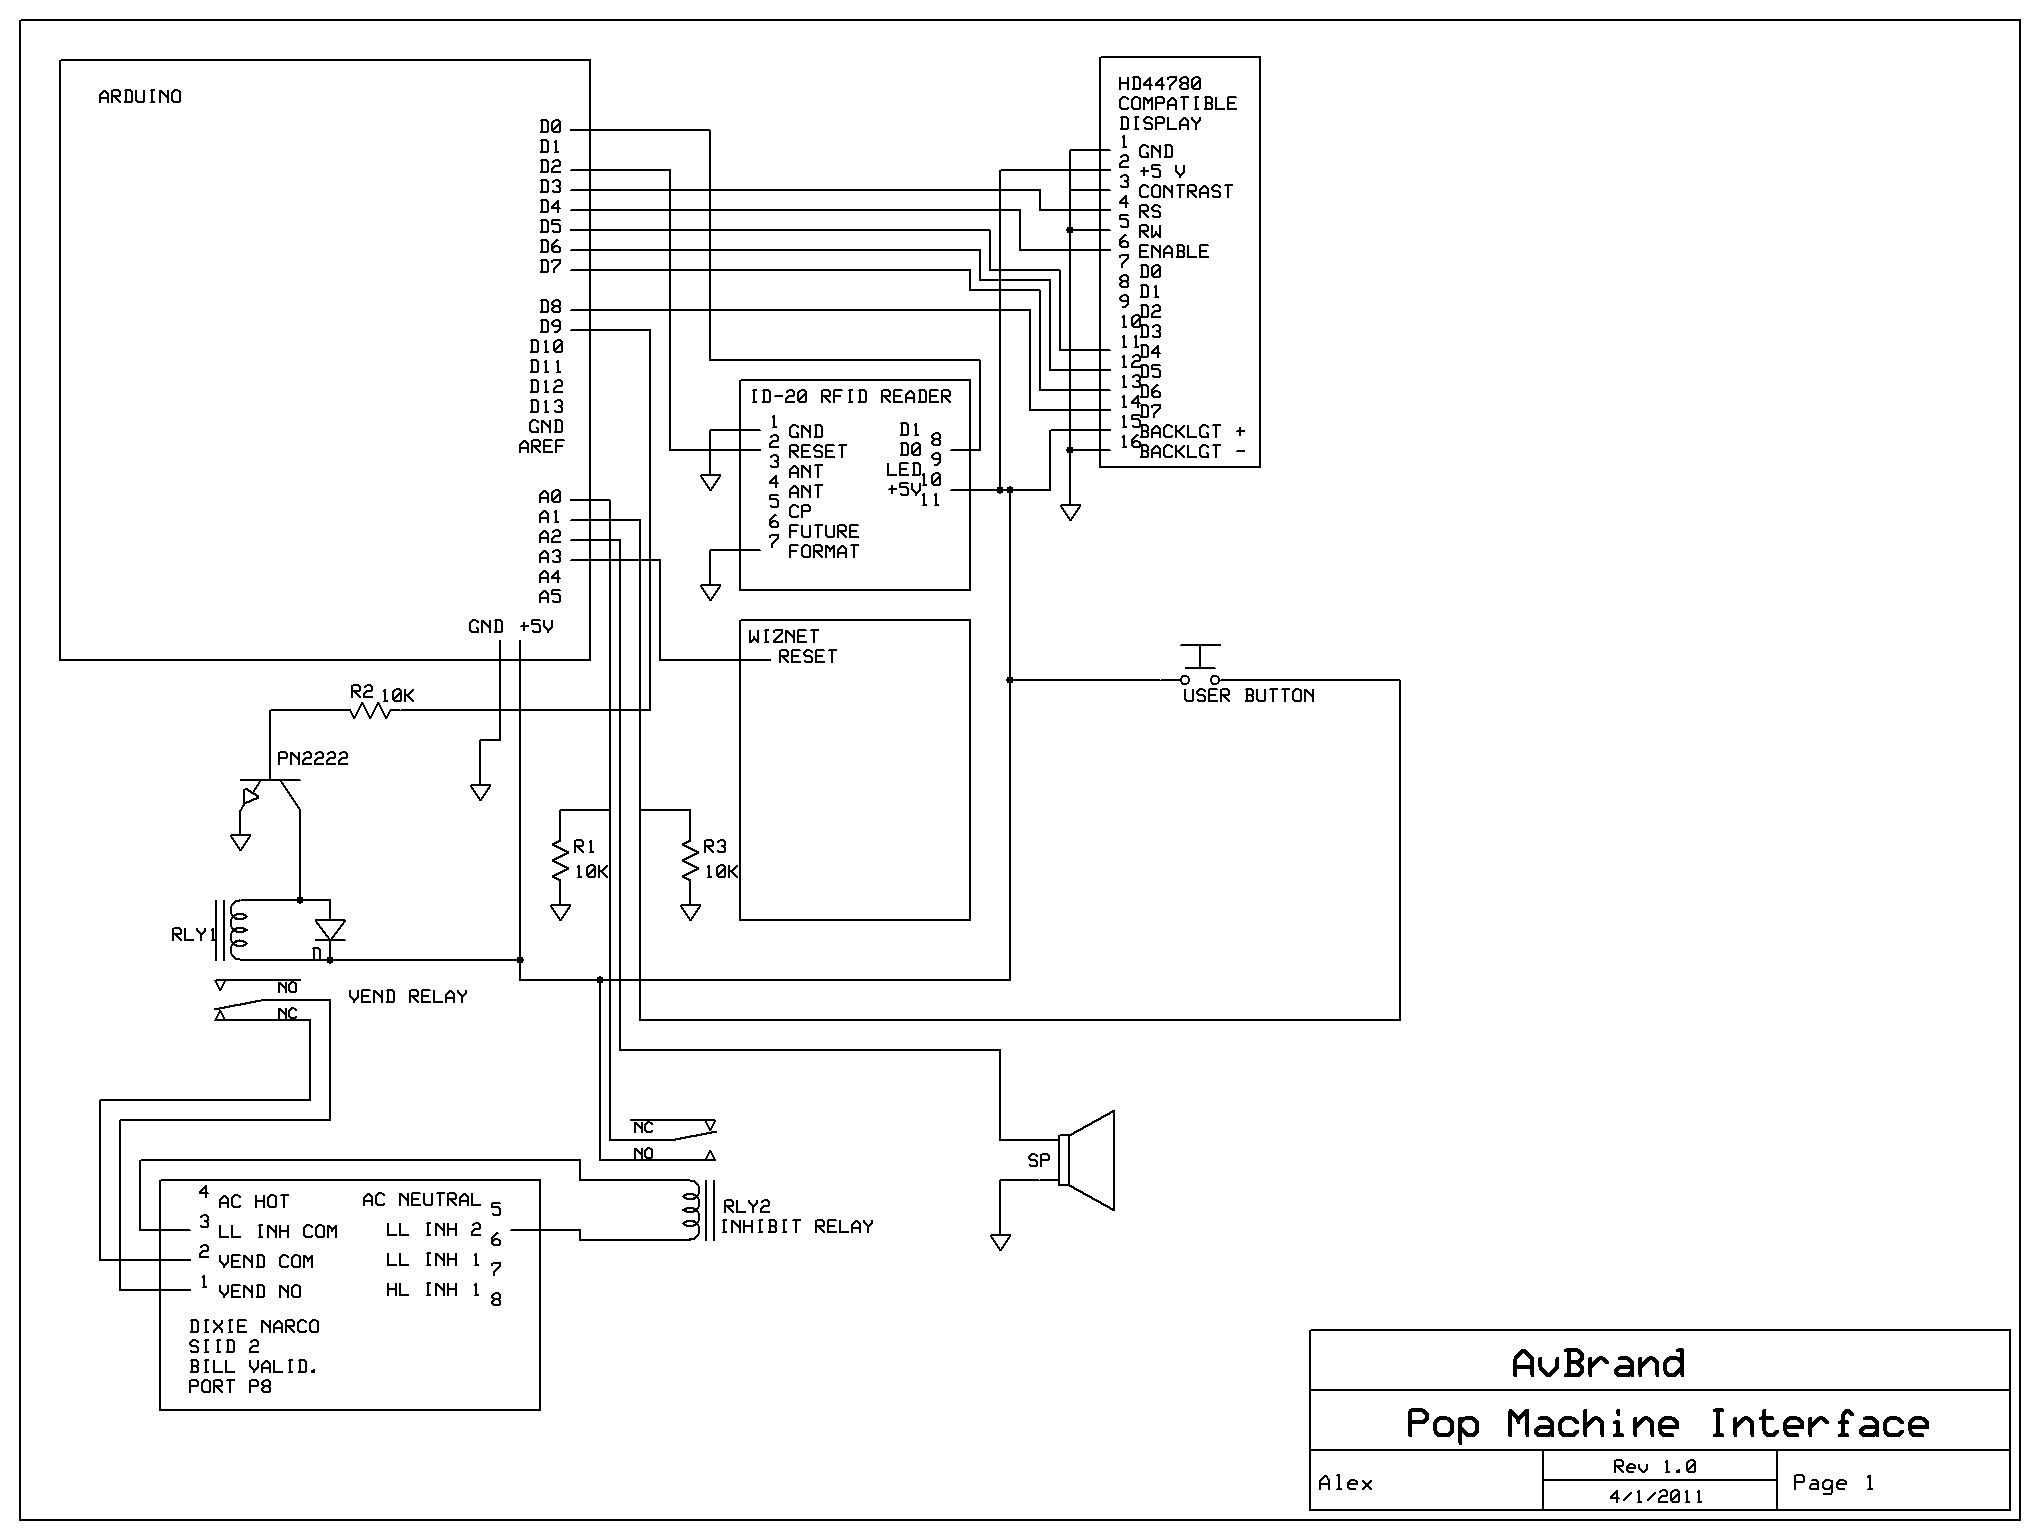
Armed with this information, I bought a new Arduino, an Adafruit ethernet shield, a Wiznet ethernet module, an LCD screen, and an RFID reader. Here's the initial set up:
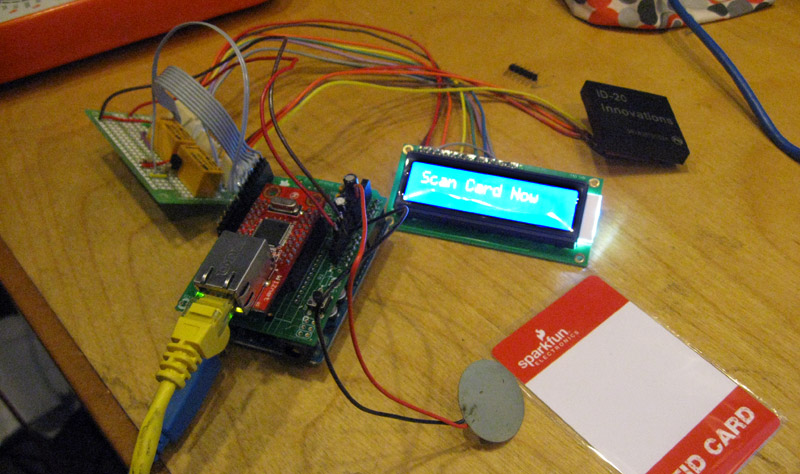
The basic operation of the system is like this: A user scans their card, which is read via the RFID reader. The ID is sent to a piece of software running on one of my servers, which compares it to a database and retrieves the user name and their current credit amount. This is then displayed. If the vending machine is ready to accept money, pressing a "buy" button subtracts $1 from the account and places it in the machine. The user can then use that money to make a beverage purchase.
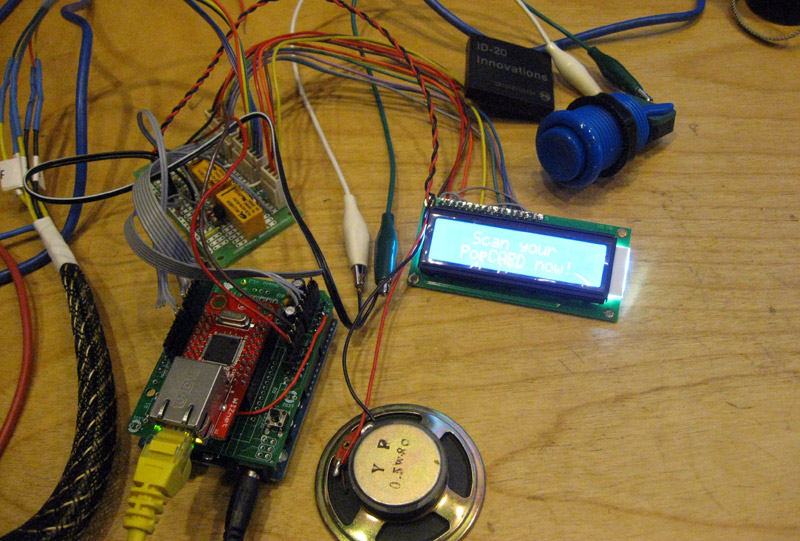
The final setup before it was mounted into the pop machine. I added a speaker to provide audio feedback. It plays the "1-up" sound from Mario!
Here's a Youtube video of the system operating before I mounted it into the machine:
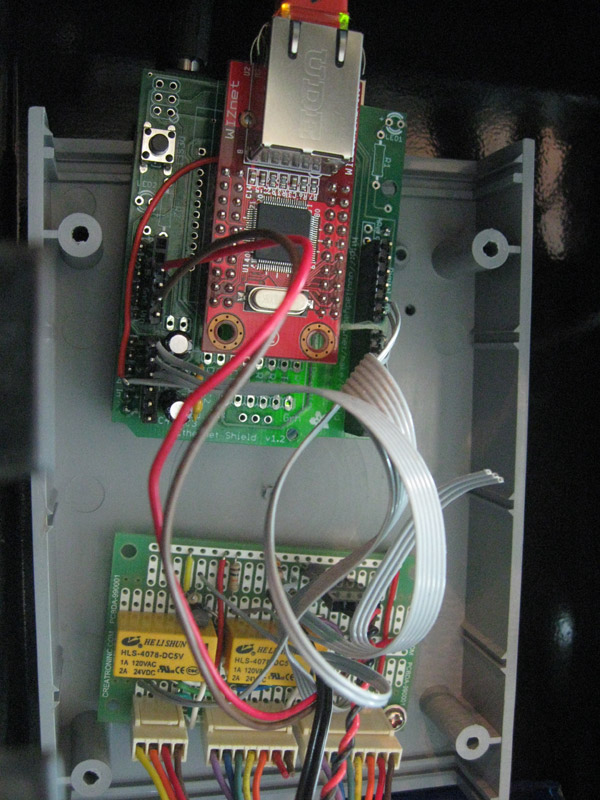
Inside the machine, the relay board and the Arduino were mounted into a plastic case.
Since we don't have dollar bills in Canada, my machine doesn't have a bill changer. So I used the bill changer opening as an access hole for the LCD display, RFID reader, and pushbutton.
The alligator clips are temporary -- I need to buy some spade connectors.

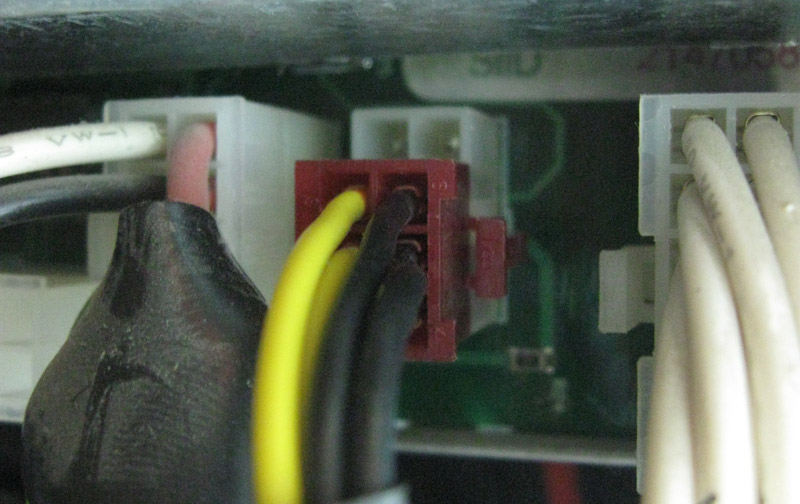
Here's that 8-port connector on the back of the vending control board. I found that a 6-pin PCI-E power cable matched the bottom 6 holes perfectly, while also leaving the 110V AC holes not connected.
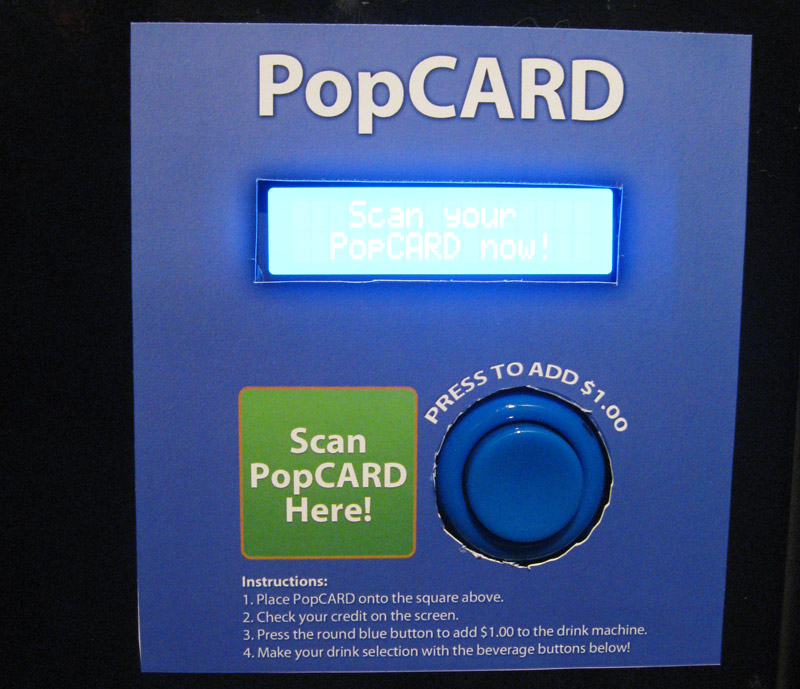
On the front of the machine, I create a (crappy) template to display instructions and tell people what to do:
Finally, here's a video of the whole thing in operation, including buying a drink:
This is probably one of the more complicated Arduino-based builds I have done, and I am very happy with how well it works!
View the Arduino source code for the pop machine interface here.
Here's a schematic of the electronics. Click to enlarge.
UPDATE! PopCARD v2
The system described above worked well, but it had a few drawbacks:- You had to know the cost of the item you were buying
- You had to press the button to buy, multiple times
- If you added money and then your selection was sold out, you wouldn't get that money back
- The cut-out around the button was terrible!
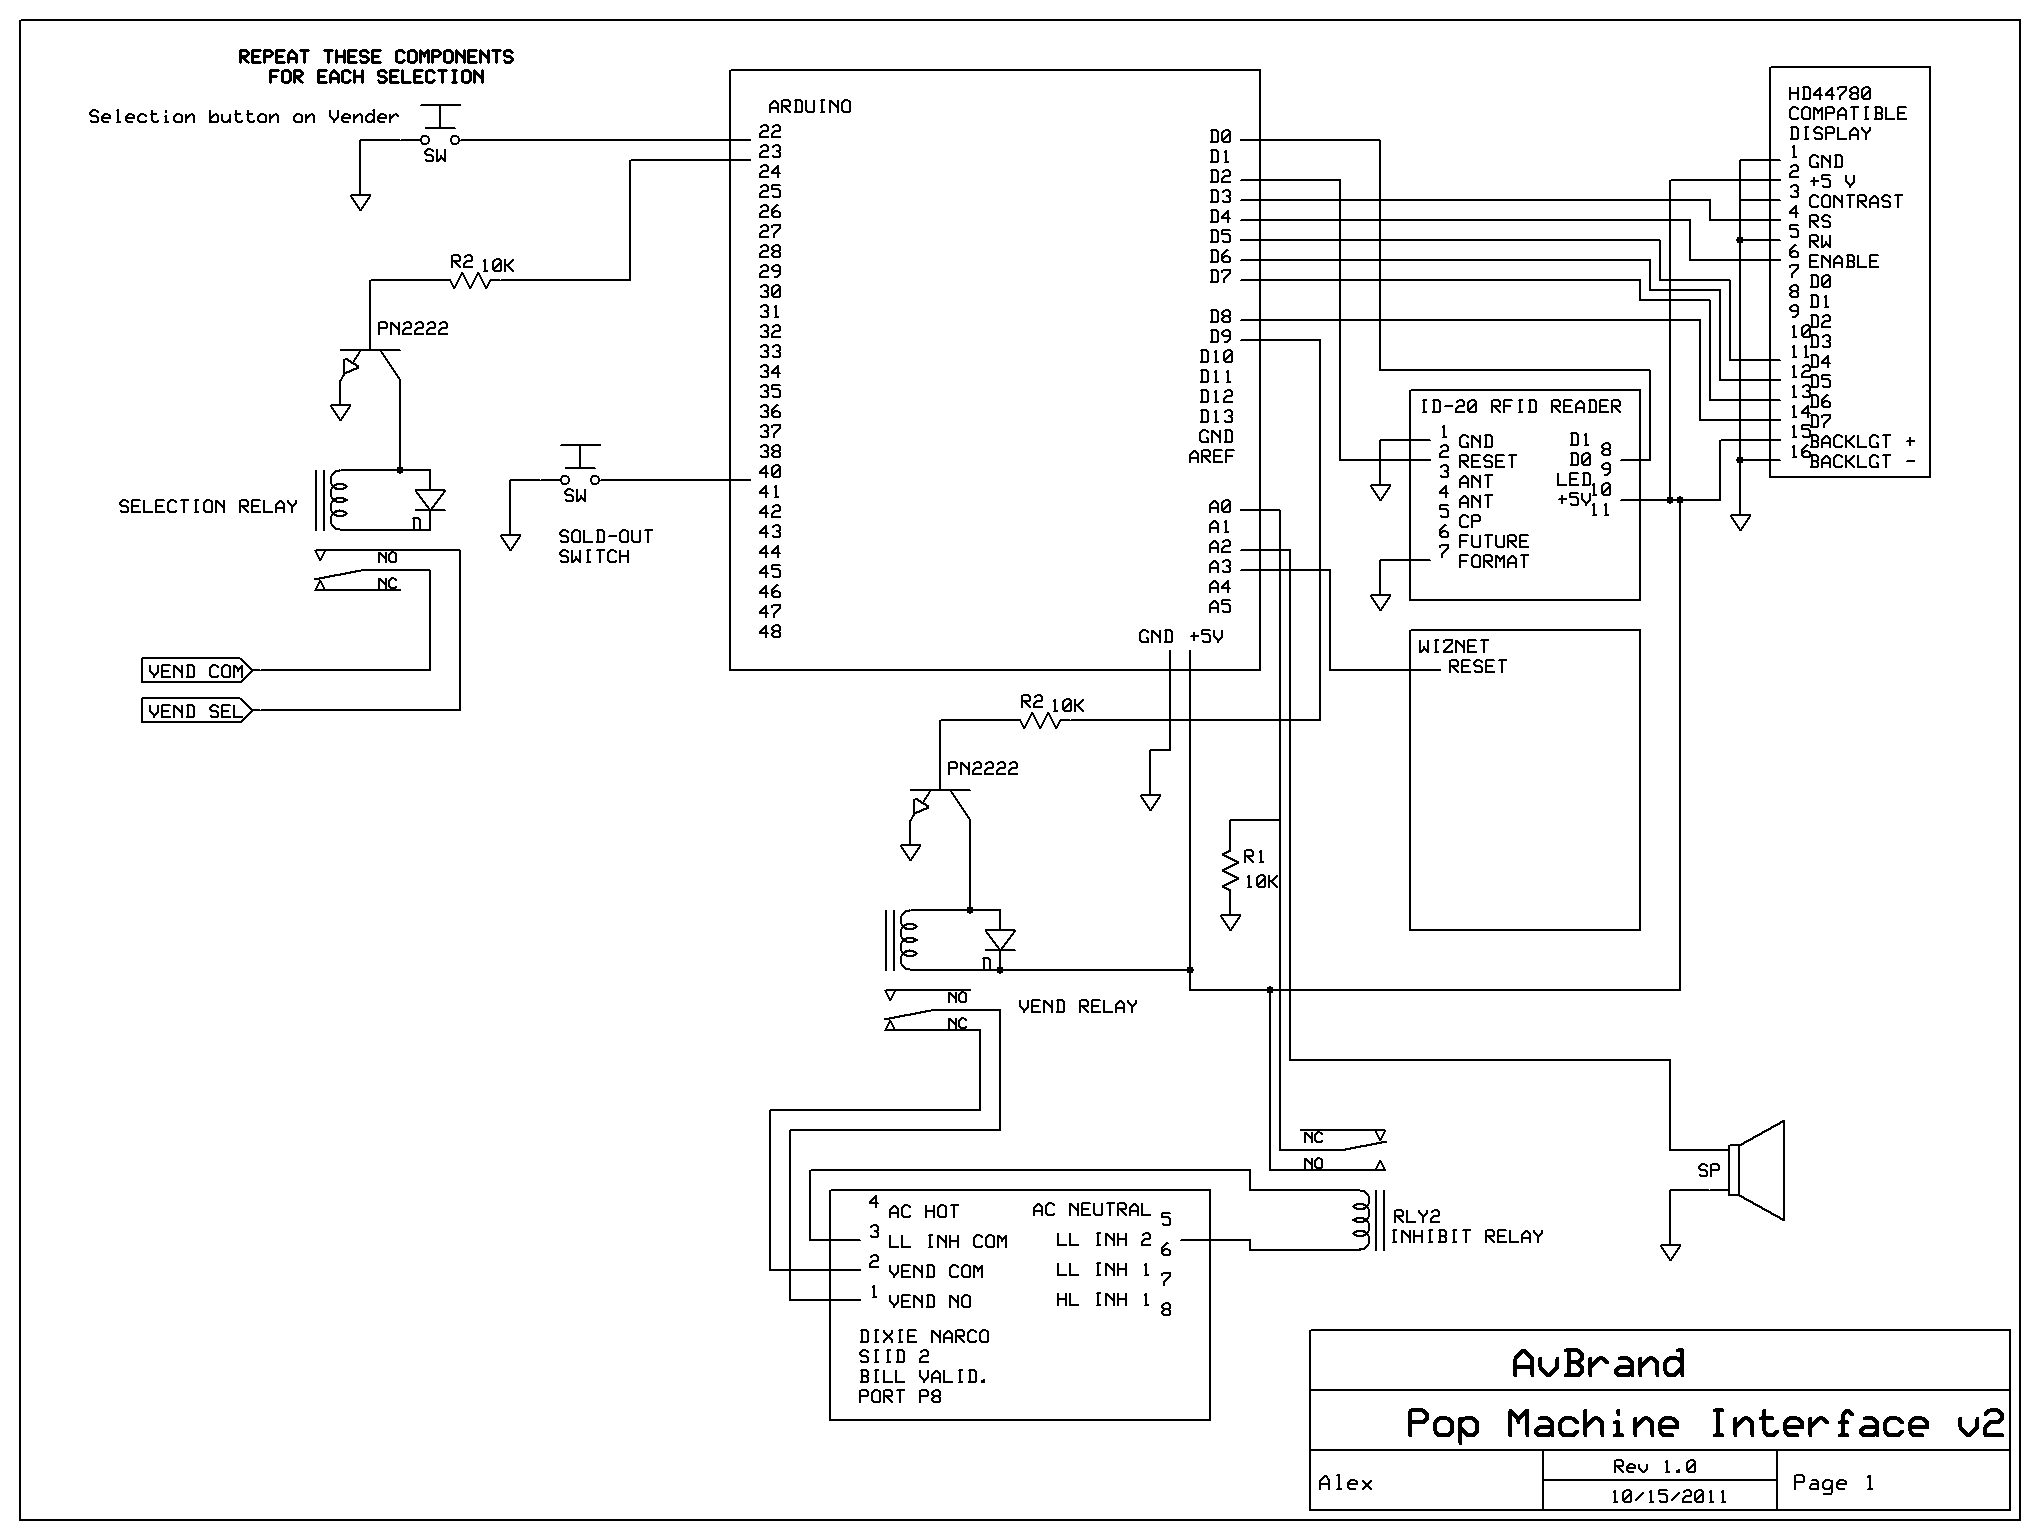
The basic plan was to have, for each of the 9 selections, a digital input for the physical button, one output to "press" the button, and one input to read the status of the Sold Out switch. That's 27 more inputs/outputs that I need.
I upgraded from an Arduino Uno to an Arduino Mega, which is only $20 more expensive. The mega has dozens more inputs and outputs, which would be plenty.
My friend Olefin helped me try to figure out the signalling inside the machine. After much unsuccessful programing, we determined that the machine appeared to operate on signals of negative 0.9V, which was bizarre. Any hopes of a simple pull-up resistor to 5V were dashed. Olefin suggested simply using one relay per button, and "taking over" the handling of the physical input buttons myself. This brilliant idea also gave me the power to "lock" the physical buttons when I didn't want the user to be able to press them, such as during a vend.
After several long soldering sessions, the new relay board was complete. I had a few problems upgrading to the Arduino Mega, such as the Ethernet Sheild no longer working, but I was able to solve them. (I wonder why they moved the SPI pins)
Check out this video of the second version of the PopCARD system in operation.
Here's a schematic of the new electronics. Click to enlarge. Keep in mind that the three things on the left side need to be repeated 9 times, once for each selection.
View the version 2 source code for the pop machine interface here.
People keep bugging me to show the server-side source code. It's really not very exciting, in fact it's an extremely simple server that just listens for a connection, checks the database, and then feeds information back. But by popular demand, here it is. Server Source Code.